Form to Google Sheets: Send Entries in 5 Simple Steps

In short:
- Sending a form to Google Sheets adds each new entry as a row in a spreadsheet, automatically, so your team can sort, filter and share entries without logging in to WordPress.
- You can do it with a connector service such as Zapier, a webhook, or a form plugin with a built-in Google Sheets connection.
- In FillKite Pro it takes five steps: connect your Google account, turn on Google Sheets for the form, send a test, open the sheet, and share it.
- FillKite creates the sheet for you, adds the form’s earlier entries, keeps a column per field, and never sends spam.
- Keep WordPress as the main record. The sheet is a convenient copy for reporting and sharing.
Sending a form to Google Sheets is one of the most requested form features, and for good reason. A spreadsheet is where many small teams already work: sales track leads there, event organisers keep guest lists, and managers build quick reports. Getting entries into a sheet automatically saves copying and pasting every day.
This guide compares the ways to connect a form to Google Sheets, shows how to do it in five simple steps with FillKite Pro, and covers privacy, formulas and the mistakes that break a sheet over time.
Why send a form to Google Sheets?
- Share without WordPress logins. Colleagues, clients or volunteers can see entries in a sheet you share with them.
- Sort, filter and chart. Spreadsheets make quick analysis easy: counts by service, totals by month, charts for a meeting.
- Feed other tools. Many apps can read from Google Sheets, so the sheet can become a simple bridge.
- A familiar view. Some people simply prefer rows and columns to an inbox.
Form to Google Sheets examples
A simple lead tracker
Your quote form sends each request to a sheet. Add two columns of your own on the right, “Owner” and “Next step”, and the sales team has a shared tracker that fills itself. The inbox still holds statuses and replies; the sheet is the at-a-glance view for the weekly meeting.
An event guest list
Your registration form sends each booking to Google Sheets, with ticket type and dietary needs. On the day, print the sheet or open it on a tablet at the door. Volunteers can check people in without a WordPress login.
An order log for a paid form
A Stripe payment form sends each paid order to a sheet, with the product and amount. Because entries are sent only once paid, the sheet matches your real sales, and a total at the bottom of another tab gives a running figure.
Volunteer or job sign-ups
A sign-up form sends applicants to a sheet the coordinator shares with a small team, who sort by availability and skills. Keep the sheet private to named people, because it holds personal details.
In each case, sending the form to Google Sheets turns a stream of emails into a list the whole team can use.
Whatever you use the sheet for, the principle is the same: the form collects the data once, correctly, and the spreadsheet presents it to the people who need it, in the way they are used to. Nobody retypes anything, and nothing is lost between the website and the team.
Three ways to connect a form to Google Sheets
| Method | How it works | Trade-off |
|---|---|---|
| A connector service (Zapier, Make) | The form triggers a “zap” that adds a row | Monthly cost per task, another account to manage |
| A webhook to a script | The form posts JSON to a Google Apps Script | Flexible, but you write and maintain code |
| Built into the form plugin | The plugin adds rows through your Google account | Needs a plugin that includes it |
A built-in connection is the simplest for most sites: no extra service, no code and no per-task fees. FillKite Pro includes it.
How to send a form to Google Sheets in 5 simple steps
1. Connect your Google account
In WordPress, go to FillKite → Integrations and connect Google. FillKite asks only for access to files it creates itself, not to the rest of your Drive. The same connection powers Google Drive storage for file uploads.
2. Turn on Google Sheets for the form
Open the form in the builder, go to the Settings tab and find Google Sheets. Turn on Send entries to Google Sheets and update the form.
3. Send a test entry
Submit the form once. With the first entry after you turn it on, FillKite creates a spreadsheet in your connected Google Drive named after the form, and adds the form’s earlier entries too, so the sheet starts complete rather than empty.
4. Open the sheet
Back in the form’s settings, use Open the sheet. The first columns are the entry number and the time it was submitted, followed by one column per field. Each new entry is added as a row a few seconds after it arrives.
5. Share it
Share the form to Google Sheets spreadsheet from Google Drive with the people who need it, with view or edit access as appropriate. They do not need a WordPress account.
How a form to Google Sheets connection behaves over time
Forms change, and a good form to Google Sheets connection keeps up without breaking:
- New fields get new columns. When you add a field to the form, it gets a new column at the end, so existing columns do not shift.
- Labels stay current. The header row uses the fields’ current labels.
- Nothing is sent twice. The first fill takes earlier entries once; new entries follow one by one.
- Failures are retried. Each row is sent in the background and retried after 5 and 30 minutes if Google is unreachable.
What the columns look like
Every form to Google Sheets spreadsheet starts with two fixed columns: the entry number and the date and time it was submitted. After that, each field in the form has its own column, in the order the fields had when the sheet was created. Fields added later appear at the end, so nothing you have built on the existing columns moves. Choices show as the option the visitor picked; multi-choice answers show all their selections in one cell; uploaded files, if the form has any, show as links.
The entry number is useful when you need to find the full entry in WordPress: search the inbox for it, and you have the complete record with notes and status.
Build reports from the sheet
Once entries flow into the sheet, a second tab can turn them into a report without touching the data:
- Counts by service: a pivot table on the service column shows which services people ask about most.
- Entries by month: a pivot on the Submitted column grouped by month shows seasonality.
- Totals for paid forms: a SUM over the amount column gives revenue so far.
- Charts: Google Sheets builds a chart from any of these in two clicks.
Because FillKite adds new rows below the existing ones, reports that read whole columns update automatically as new entries arrive.
Spam and payments
A shared spreadsheet full of bot submissions is worse than no spreadsheet. FillKite never sends entries caught as spam to Google Sheets. On paid forms, an entry is sent once its payment succeeds, so the sheet shows real orders only. Keep your normal spam protection on; our guide to WordPress form spam covers the layers.
Formulas and safety when you send a form to Google Sheets
Spreadsheets treat anything starting with “=” as a formula. If a visitor types an answer that begins with “=”, a careless integration could turn it into a formula in your sheet, which is a known risk called formula or CSV injection. FillKite writes values as plain text, so an answer that starts with “=” stays text and never runs.
You can still add your own formulas and charts in other columns or other tabs. Keep them away from the columns FillKite writes to, so new rows never overwrite your work.
Working as a team from one sheet
A shared form to Google Sheets setup works best with a few simple rules. Only FillKite writes to the data columns; people add notes and owners in their own columns to the right. Nobody sorts the data tab directly, because sorting in place can confuse whoever is reading next; use filter views instead, which each person can set up without changing what others see. And replies still happen from the inbox, so statuses and reply times stay accurate.
Troubleshooting a form to Google Sheets connection
- Nothing appears after a test: check that Google is connected on Integrations and that the form’s switch is on and saved. Rows arrive a few seconds after the entry.
- A row is missing: it may have been caught as spam, or it may be a paid form waiting for payment. Check the entry’s status in the inbox.
- Google was down for a while: rows are retried after 5 and 30 minutes, so they usually catch up on their own.
- The sheet was deleted by mistake: restore it from Google Drive’s bin; your entries are safe in WordPress either way.
A free alternative: webhooks
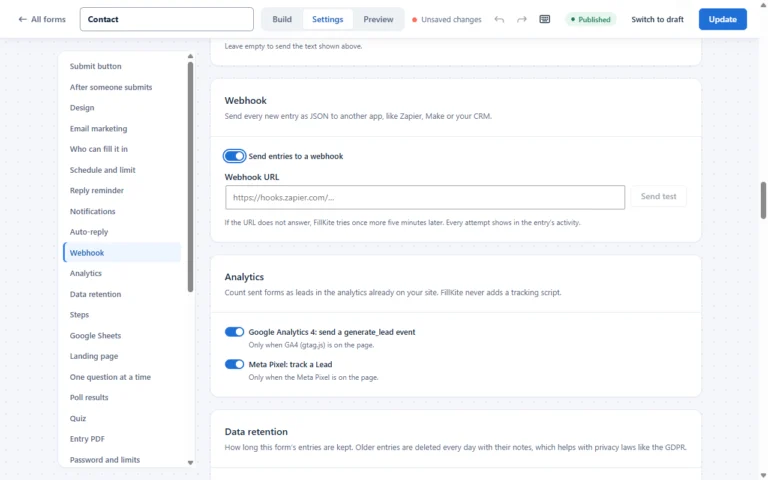
If you use the free version of FillKite, webhooks can still get entries into other tools. A webhook sends each new entry as JSON to an address you choose, such as a Zapier or Make trigger, or a Google Apps Script you write yourself. It needs more setup than the built-in connection, but it is flexible and works with many services beyond Google Sheets.
When a sheet is not the right tool
A form to Google Sheets connection is great for sharing and reporting, but it is not a CRM or a helpdesk. If you need reminders, reply tracking, conversation history or a record of who did what, those live better in your form inbox or in a dedicated tool fed by a webhook. Use the sheet for what spreadsheets do best: lists, filters, totals and charts. Trying to run your whole follow-up process in a sheet usually ends with colour-coded cells nobody fully understands.
Limits worth knowing
Google Sheets has generous but finite limits on the number of cells in a spreadsheet. A busy form with many fields will take years to reach them, but if you run a very high-volume form, start a new sheet each year and archive the old one. Very long answers are fine in a cell, though they are easier to read in the inbox.
Privacy when you send a form to Google Sheets
Sending entries to Google Sheets means copying personal data to Google. Mention it in your privacy policy, share the sheet only with people who need it, and remember that deleting an entry in WordPress does not delete its row in the sheet. If you use a retention period on the form, clean up old rows in the sheet on the same schedule. Our guide to the GDPR contact form covers retention in more detail.
Several forms, several sheets
Each form gets its own spreadsheet, named after the form. That keeps contact enquiries, quote requests and event bookings apart, each with the right columns. If you want one overview across forms, build it in a separate spreadsheet that reads from the others, rather than sending every form to Google Sheets into one mixed tab. Mixed tabs quickly become hard to read because each form has different fields.
Before you start
A little planning makes a form to Google Sheets setup smoother. Give fields clear, short labels, because they become column headers. Decide who needs the sheet and at what access level. Think about which extra columns your team will add, such as owner or status, and leave them to the right of the data. And agree that the WordPress inbox stays the place for replies, so nobody wonders which copy is the real one.
Keep WordPress as the main record
A sheet is a copy for convenience. Replies, statuses, notes and follow-up belong in your form inbox, where each entry has a reply timer and a clear owner. If someone edits a row in the sheet, that change does not flow back to WordPress. Treat the sheet as a report and a sharing tool, and the inbox as the place where work happens. Our guide to WordPress form entries explains the inbox side.
A form to Google Sheets checklist
- Google connected once on Integrations.
- Google Sheets turned on for each form that needs it.
- A test entry confirmed in the sheet, with earlier entries added.
- Your own notes and formulas kept in separate columns or tabs.
- The sheet shared only with named people.
- Your privacy policy mentions Google as a processor.
- Old rows cleaned up on the same schedule as the form’s retention.
Review the setup twice a year
Sheets drift. People gain access and never lose it, extra tabs pile up, and a column someone added for one project stays forever. Twice a year, open each form’s sheet, remove access for anyone who no longer needs it, delete rows older than your retention period, and tidy any tabs that nobody uses. Check that the form to Google Sheets connection is still active by sending one test entry. Ten minutes keeps the sheet useful and keeps personal data where it should be.
Where a form to Google Sheets connection goes wrong
| Problem | Cause | Fix |
|---|---|---|
| No rows appear | Google not connected, or Sheets not turned on | Connect on Integrations, enable per form |
| Columns shift after edits | Integration maps by position | Map by field, add new columns at the end |
| Formulas broken by new rows | Formulas in the data columns | Keep calculations in other columns or tabs |
| Spam rows | Every submission sent | Send only accepted entries |
| Sheet shared too widely | Link sharing left on | Share with named people only |
Formsite Google Sheets integration, and the WordPress way
If you searched for a Formsite Google Sheets integration, here is the short version. Formsite is a hosted online form service, and it has its own Google Sheets connection: you enable it in the form’s settings under Integrations, authorize your Google account, and results are sent to a sheet. At the time of writing, Formsite’s help page says the feature needs a Professional level account; see Formsite’s Google Sheets help page for the current details.
A form to Google Sheets connection on Formsite is for forms you host on Formsite. If your form lives on a WordPress site, you need a connection on the WordPress side, and this guide shows how to connect a form to Google Sheets that way: connect your Google account, turn on Google Sheets for the form, send a test entry and open the sheet. Your entries stay in your own site as well, so the form to Google Sheets copy is a convenient sheet for reports, not the only place your leads live.
Frequently asked questions
Can I use a Formsite Google Sheets integration on WordPress?
Formsite’s own Google Sheets integration works for forms you host on Formsite. For a form on your WordPress site, use a connection built into your form plugin. In FillKite, connect your Google account, turn on Google Sheets for the form, and each entry becomes a row.
Do I need Zapier to send a form to Google Sheets?
Not with FillKite Pro. The Google Sheets connection is built in, with no connector service or per-task fees.
Can I choose an existing spreadsheet?
FillKite creates a spreadsheet for each form in your connected Drive and keeps its columns up to date. You can add your own tabs and formulas alongside the data.
Will old entries be added?
Yes. When the sheet is created, the form’s earlier entries are added first, then new entries follow.
How quickly do rows appear?
Usually a few seconds after the entry arrives. Rows are sent in the background, so the visitor never waits for Google.
What happens if I rename a field?
The column stays in place, because columns follow the field, not its label, and the header row updates to the new label.
Is Google Sheets part of the free plugin?
Google Sheets is part of FillKite Pro. The free plugin includes webhooks, which can send entries to other tools, and CSV and Excel exports.
Send every form to Google Sheets, automatically. FillKite Pro creates the sheet, fills in earlier entries, keeps a column per field, and never sends spam. Compare FillKite Pro, see the integrations, or install FillKite free from WordPress.org.
Last updated: